Incident Response

Think You Were Hacked? Here's What To Do.

Don't panic. Work through these four phases in order. Select what happened to you and follow the steps built for your situation.

How this works

Choose your breach type below, then step through four phases: Contain (stop the bleeding), Assess (understand the damage), Recover (rebuild access and report), and Harden (close the gaps so it doesn't happen again). Each phase has specific actions tailored to what was compromised.

What was compromised?
Person discovering fraudulent bank transactions on a laptop
Phase 1 of 4

Contain — Stop the Bleeding

Your goal in the next 15 minutes is to prevent any further unauthorized transactions or access.

Call your bank or card issuer immediately using the number on the back of your card — not any number from an email or text you received. If you can't call right now, freeze your card through your bank's app first.
1

Freeze or lock the affected account right now

Most banks have a card freeze in the app. Use it immediately. If unauthorized transfers occurred, call the fraud line — do not use a number from any email you received.

  • Freeze card in mobile app (Chase, BofA, Wells Fargo, Citi — all have this)
  • If online banking was accessed: change your password NOW from a trusted device
  • Enable a session logout / "sign out of all devices" if available
2

Document everything before you change anything

Before you start resetting things, take screenshots. You'll need these for the fraud claim and potentially for law enforcement.

  • Screenshot all unfamiliar transactions with dates and amounts
  • Screenshot any emails or texts related to the breach
  • Note the exact time you first noticed something was wrong
3

Check if other accounts use the same password

If your bank login was compromised, any account with the same password is also at risk right now.

  • Think of your top 5 most sensitive accounts — email, other banks, brokerage, PayPal/Venmo/Zelle
  • Log into each and change the password if it matches (or is similar) to the breached one
Phase 2 of 4

Assess — Understand the Damage

Now that you've stopped the immediate risk, figure out the full scope of what was taken or accessed.

1

Pull your full transaction history — go back 90 days

Attackers often make small test charges days or weeks before larger ones. Look for:

  • Charges under $1 (card testing)
  • Unfamiliar merchant names — look up anything you don't recognize
  • Recurring charges you didn't authorize
  • Transfers to accounts you don't own (Zelle, ACH)
2

Check your credit report for new accounts or inquiries

If someone accessed your banking credentials, they may have also applied for credit in your name. You do not need a police report for most cases — the FTC report is accepted by banks and credit bureaus. Only involve local police if a creditor specifically requires it or you know the thief personally.

  • Pull your free report at AnnualCreditReport.com (the official government-mandated site)
  • Look for accounts you didn't open or hard inquiries you didn't authorize
  • Check all three bureaus: Equifax, Experian, TransUnion
3

Determine how they got in

Understanding the entry point matters for your fraud claim and for preventing recurrence.

  • Phishing email/text — you were sent a fake login page
  • Data breach — your credentials leaked from another service (check HaveIBeenPwned.com)
  • Reused password — same password used on multiple sites
  • Malware — a keylogger or screen capture on your device
  • SIM swap — attacker took over your phone number to intercept SMS codes
Phase 3 of 4

Recover — Report, Rebuild, Restore

File the right reports, dispute the charges, and rebuild your financial access on a clean foundation.

1

File a formal fraud claim with your bank

Federal law (Regulation E for bank accounts, Fair Credit Billing Act for credit cards) protects you — but only if you report promptly. Credit cards: generally 60 days. Debit cards: 2 days for full protection, 60 days maximum.

  • Call the fraud department — ask for a case number and write it down
  • Request a written confirmation of the dispute
  • Ask how long the investigation will take and when you'll receive provisional credit
  • Ask for a new account number and card, not just a new card
2

Place a credit freeze at all three bureaus

A freeze stops anyone from opening new credit in your name — it's free and the single most effective thing you can do against identity theft.

Most guides skip two bureaus: also freeze ChexSystems (blocks thieves from opening a new bank account in your name) and Innovis (a fourth bureau many lenders check). All five freezes are free. Do all five.

3

Report to the FTC and optionally local law enforcement

An FTC report (IdentityTheft.gov) creates a legal record and gives you an official document to show creditors. For losses over $500, a police report may help with reimbursement claims.

  • File at IdentityTheft.gov — takes about 10 minutes, generates a personalized recovery plan
  • For wire fraud or large losses, report to the FBI's IC3 at ic3.gov
  • If you received a fraudulent text/email, forward it to 7726 (SPAM)
When to call local police: If you know or suspect the thief personally, if a physical device was stolen, or if a creditor specifically requires a police report number to process a claim. Otherwise the FTC report is sufficient.
4

Check your homeowners or renters insurance policy

Many homeowners and renters insurance policies include an identity theft rider or endorsement that covers losses, legal fees, and recovery services — often up to $15,000-$25,000. Most people never think to call their insurer during a financial breach, but this is exactly what that coverage is for.

  • Call your insurance company and say: "I've been the victim of identity theft and financial fraud. Do I have any identity theft coverage or endorsement on my policy?"
  • If yes, ask them to open a claim immediately — coverage is typically time-sensitive from the date of discovery
  • Keep a copy of your FTC identity theft report (IdentityTheft.gov) — insurers will request it
  • Coverage can include: lost wages, attorney fees, notary/certified mail costs, and fraud-related account fees
5

Rebuild trust with family members who may have been affected

If shared accounts or family members' information was exposed, be direct with them. Silence creates more anxiety than honest communication.

  • Tell affected family members what happened without over-explaining — "our bank account was accessed without permission, I've filed a fraud claim and our money is protected while they investigate"
  • Let them know what you're doing about it (Phase 4)
  • If a child's SSN or identity was involved, report separately at identitytheft.gov/child-identity-theft
Phase 4 of 4

Harden — Close the Gaps

Now rebuild on a stronger foundation so this can't happen the same way twice.

The fraud and reporting are behind you. These steps are about making sure your financial accounts are structurally harder to attack going forward.
1

Set up a password manager — all financial accounts get unique passwords

This is the single most impactful change you can make. A password manager generates and stores long, random, unique passwords — you only remember one master password.

2

Enable app-based two-factor authentication on every financial account

Use an authenticator app (Authy or Google Authenticator) — not SMS. SIM swap attacks can intercept text codes. Your bank, brokerage, PayPal, Venmo, and Zelle all support this.

3

Set up account alerts for all transactions

  • Enable real-time push notifications for every transaction
  • Set a threshold alert for any purchase over $50 (or your comfort level)
  • Enable alerts for new payees added (for bank transfers)
  • Review account login notifications — know every time someone logs in
4

Consider a credit monitoring service

Credit freezes prevent new accounts but don't alert you to misuse of existing ones. Monitoring catches things freezes don't.
  • Your bank may already offer free monitoring — check first
  • Credit Karma (free) monitors two of the three bureaus
  • Experian IdentityWorks offers all-three bureau monitoring
  • Some homeowners/renters insurance policies include identity theft monitoring
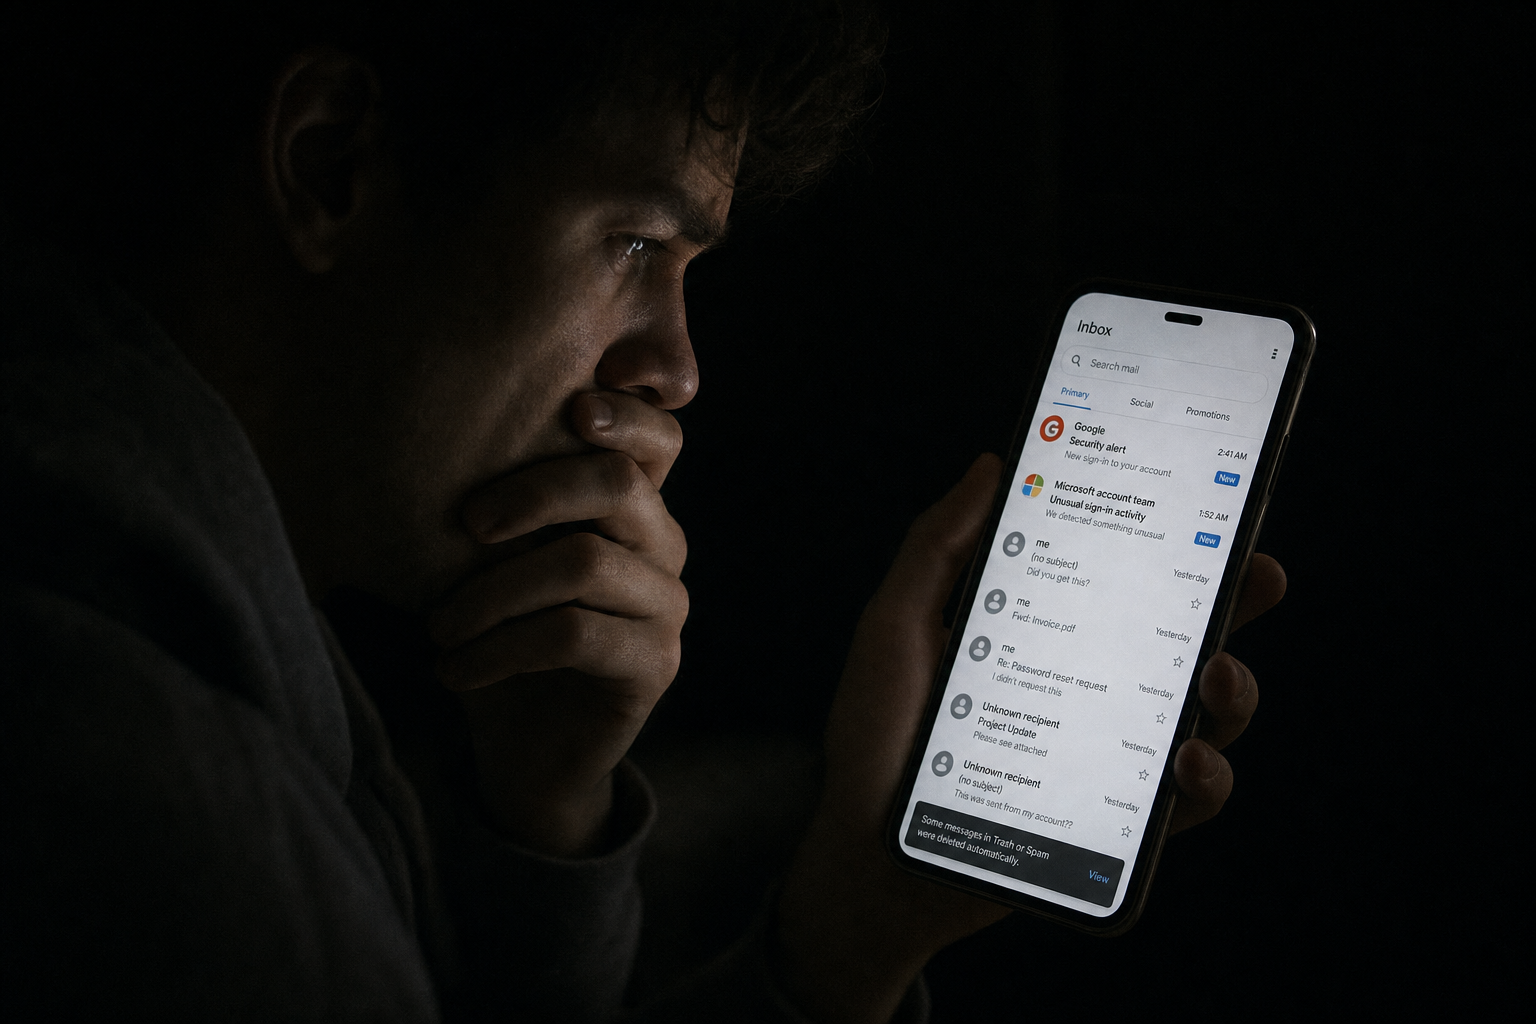
Person discovering compromised email account on a phone
Phase 1 of 4

Contain — Lock Down Your Central Account

Your email is the master key to everything else. Losing it means losing password resets for every service you use.

If you are still locked out of your email right now, skip to Phase 3 (Account Recovery). If you still have access, work through these steps immediately before the attacker changes more settings.
1

Change your email password immediately from a trusted device

Use a device you trust — ideally not the one you suspect was compromised. If possible, use a different network (mobile data instead of your home Wi-Fi).

  • Go to your email provider's security settings directly — don't click links in emails
  • Change to a long, unique password (20+ characters) — use your password manager to generate one
  • Immediately sign out of all other sessions (Google: Security > Manage Devices; Outlook: Security > Activity)
2

Check and remove any unauthorized forwarding rules

Attackers almost always set up email forwarding within minutes of gaining access — so they silently receive all your emails even after you change your password. This survives a password change. Go to Settings > Forwarding (Gmail) or Rules (Outlook) and delete anything you did not create yourself.

  • Gmail: Settings (gear) > See all settings > Forwarding and POP/IMAP — remove any address you don't recognize
  • Outlook: Settings > Mail > Forwarding — disable forwarding entirely for now
  • Also check: Filters, Rules, and any connected apps/OAuth grants
3

Revoke third-party app access you don't recognize

  • Gmail: myaccount.google.com/permissions — remove anything unfamiliar
  • Outlook: account.microsoft.com/privacy/app-access
  • Apple: appleid.apple.com > Sign-In and Security > Apps using Apple ID
  • OAuth app permissions do not expire when you change your password — an app authorized months ago still has full access until manually revoked. Go through the full list and remove anything you have not actively used recently.
  • Check if any "sign in with Google/Microsoft" sessions exist for unknown services
Phase 2 of 4

Assess — What Did They See and Do?

An attacker in your email has had access to years of your most sensitive information. Before you can recover, you need to understand how far the damage goes — your inbox touches almost every other account you own.

1

Review your Sent folder and Trash for the intrusion window

Attackers often send emails from your account to your own contacts — phishing your family and friends on your behalf. They also often send password reset emails and delete them.

  • Look in Sent for anything you didn't send
  • Look in Trash and Spam for deleted password reset emails — this tells you which of your accounts they tried to access
  • Check "All Mail" in Gmail for emails that were read and archived without your knowledge
2

Identify every account that uses this email for login or recovery

Think: banks, investment accounts, healthcare portal, Amazon, utilities, your kids' school portal. Every one of those is potentially compromised.

  • Check your password manager — every account tied to this email is at elevated risk
  • Search your inbox for "welcome to," "verify your email," and "account" to find linked services
  • Prioritize: financial, healthcare, government (IRS, SSA), then everything else
3

Check HaveIBeenPwned for exposed passwords

Phase 3 of 4

Recover — Regain Control and Notify

Recover locked accounts, notify people who may have received fraudulent emails from you, and file the right reports.

2

Change passwords on every high-value account linked to this email

Prioritize in this order: financial accounts, healthcare, government portals, then all other services. Do not reuse the email password.

  • Banks and credit cards
  • Investment / brokerage / retirement (401k, IRA)
  • Healthcare / pharmacy portals
  • IRS, SSA.gov, state DMV if you have a login
  • Amazon, Apple ID, Google account
  • Utilities with autopay
3

Notify your contacts if fraudulent emails were sent

Send a message through a different channel (text, phone call) to people who may have received emails from your account during the breach window.

Keep it simple: "My email was compromised recently. If you got a message from me asking for money, gift cards, or a link to click, please ignore it. I'm all good now — just wanted to let you know."

4

Report to the FTC if identity information was in your inbox

Phase 4 of 4

Harden — Make Your Email Fortress-Grade

Your email is the skeleton key to your entire digital life. Protecting it is the highest-return security investment you can make.

1

Enable the strongest 2FA your provider offers

Use a hardware key (YubiKey) if you want maximum security, or an authenticator app as a strong middle ground. Remove SMS as a 2FA option if you can — SIM swap attacks bypass it.

2

Consider switching to a privacy-first email provider

Proton Mail and Fastmail offer end-to-end encryption and stronger security defaults than Gmail or Outlook. Worth considering if this breach has you questioning your provider.

3

Set up recovery options and print your backup codes

  • Set a recovery phone number on a line only you control
  • Add a recovery email address on a different provider (e.g. Gmail recovery for Outlook)
  • Download and print your 2FA backup codes — store them physically, not digitally
  • Tell one trusted person where those backup codes are stored
Person discovering hacked social media account on a tablet
Phase 1 of 4

Contain — Secure What You Still Control

The attacker may be posting, messaging your followers, or running ads from your account right now. Move fast.

1

Change your password immediately if you still have access

  • Instagram: Profile > Settings > Accounts Center > Password and security
  • Facebook: Settings > Security and Login > Change password
  • TikTok: Profile > Settings > Security > Password
  • Twitter/X: Settings > Security and account access > Security > Password
  • LinkedIn: Settings > Sign in & Security > Change password
2

Log out all other active sessions

Every platform lets you see where you're logged in and force-log out other sessions.

  • Instagram: Settings > Accounts Center > Password and security > Where you're logged in
  • Facebook: Settings > Security and Login > Where you're logged in > Log out of all sessions
  • Twitter/X: Settings > Security > Sessions > Log out all other sessions
3

Remove any apps or connected services you don't recognize

Attackers often connect a third-party app to maintain access even after you change your password.

  • Instagram/Facebook: Accounts Center > Your information and permissions > Apps and websites
  • Twitter/X: Settings > Security > Apps and sessions > Connected apps
  • Remove anything you didn't personally authorize
Phase 2 of 4

Assess — What Did They Post, Send, or Steal?

Understand the full damage: posts made, DMs sent, and whether the account was used to run scams on your followers.

1

Review everything posted or messaged during the breach window

  • Check your feed / timeline for posts you didn't make
  • Check Stories / Reels / TikToks posted without your knowledge
  • Check your DM inbox for messages sent to others from your account
  • Check if your profile bio or contact info was changed
  • Check if your linked email or phone number was changed
2

Check if ads were run from your account (Facebook/Instagram)

This is one of the most common attacks — running fake ads charged to your payment method on file.

  • Facebook: Meta Ads Manager > Billing — look for charges you didn't authorize
  • Check if your payment method on file was used
  • If yes, dispute the charges with Meta AND your bank/card immediately
Phase 3 of 4

Recover — Report, Reclaim, Rebuild Trust

Reclaim locked accounts, report to the platform, and address your audience directly.

1

If locked out — use official platform recovery

Official account recovery links

Instagram Hacked Help Facebook Hacked Help Twitter/X Compromised Account Help TikTok Account Security Help LinkedIn Hacked Account Help

Critical: Anyone contacting you — via DM, email, or website — offering to recover your account for a fee is running a scam. There are no legitimate paid social media account recovery services. Use only the official links above. Someone who "found your account" and is offering to help is exploiting your situation for a second hit.

2

Post a public notice to your followers

Don't let your audience continue to be targeted. A clear, brief statement protects them and rebuilds your credibility.

"My account was compromised recently. Any messages asking for money, gift cards, or asking you to click a link were not from me. I've secured the account and this won't happen again. Sorry if you were contacted — please report and ignore those messages."

3

Report unauthorized charges to your bank

If Meta or another platform ran ads or charged your card without authorization, dispute it immediately with your bank — this is fraud and you're protected.

4

Delete posts or messages made by the attacker

  • Delete any scam posts or DMs sent from your account
  • Report any content the attacker posted — this helps the platform flag the behavior
  • If the attacker posted explicit or harmful content, report it for priority removal
Phase 4 of 4

Harden — Social Accounts Are Not Throwaway

Social accounts take years to build. Protect them like you would a financial account.

1

Enable two-factor authentication on every social account

Use an authenticator app, not SMS. Most platforms support this now. Instagram and Facebook also offer hardware key support.

2

Audit connected apps quarterly

Every app you give your social account access to is a potential attack vector. Do a quarterly review and revoke anything you no longer use.

3

Never click "sign in with" links from DMs or emails

The most common way social accounts are compromised is fake login pages sent via DM — often appearing to come from a friend whose account was already hacked. Always go directly to the platform's website.

Person discovering drained cryptocurrency portfolio
Phase 1 of 4

Contain — Stop Sending Money Right Now

Crypto and investment scams work by convincing you to keep sending more. The single most important thing is to stop all transfers immediately.

If the scammer is still in contact with you: Do not send another dollar. No "withdrawal fee," no "tax payment," no "account unlock fee" is real. Stop all contact. The money you've already sent cannot be recovered by sending more — that is always another layer of the scam.
1

Stop all transfers and block contact immediately

  • Stop any pending wire transfers at your bank — call the wire department directly (not regular customer service) and ask to recall or block it.
  • If you used an exchange like Coinbase or Kraken (not a self-custody wallet), contact their fraud team immediately — exchanges can sometimes freeze withdrawals or flag the destination address before funds move off-platform. This is not possible with a personal wallet.
  • Stop any crypto purchases and transfers
  • Block the scammer on all platforms
  • Do NOT let anyone you met online remotely access your computer or phone
2

Secure your real financial accounts

If you provided any login credentials, account numbers, or allowed remote access during the scam, treat those accounts as compromised.

  • Change passwords on any account you shared credentials for
  • Call your bank and flag recent wire transfers as potentially fraudulent
  • If you gave remote access to your computer, run a malware scan immediately
3

Document everything — do not delete anything yet

  • Screenshot all conversations (text, app, email, social DM)
  • Screenshot the fake investment platform or website
  • Record all transaction amounts, dates, and methods (wire, Zelle, crypto, gift card)
  • Save the wallet addresses you sent crypto to
  • Note the scammer's phone numbers, email addresses, usernames
Phase 2 of 4

Assess — Understand What Happened

Crypto and investment scams have specific names and reporting paths. Knowing the type helps law enforcement and may affect your recovery options.

1

Identify the scam type

Not sure which one applies to you? Start with the simplest question: Did someone contact you first? If yes, it's almost certainly a relationship-based scam (pig butchering or celebrity impersonation). Did you click a link and connect your crypto wallet? That's a wallet drainer. Did someone get remote access to your computer? Tech support scam. Match your experience to the closest description below:

  • Pig butchering (romance scam + investment) — relationship built over weeks or months, introduced to fake crypto platform. Extremely common. Very large losses.
  • Fake investment platform — showed you big fake gains, then asked for fees to withdraw. Funds were never real.
  • Rug pull — real crypto project that abandoned the coin after taking funds
  • Wallet drainer — malicious link or app that drained your actual crypto wallet. If you connected your wallet to any website recently, check for malicious "approve" or "setApprovalForAll" transactions. Use Etherscan's Token Approval tool to revoke any permissions you did not intentionally grant.
  • Tech support scam — impersonated Microsoft/Apple/bank, gained remote access, transferred funds
  • Celebrity impersonation — fake Elon Musk, investment guru, or bank officer
2

Calculate the total loss across all methods

  • Wire transfers
  • ACH / bank transfers
  • Gift cards (note the type, amounts, and store)
  • Crypto (note the token, wallet addresses, transaction hashes)
  • Zelle, Venmo, Cash App payments
3

Be honest with yourself about recovery odds

Crypto transactions are generally irreversible. Wire transfers may be partially recoverable if reported within 72 hours. Gift cards are almost never recoverable. Law enforcement can occasionally freeze or seize assets, but it's rare and slow. Report anyway — it protects others and contributes to prosecution.

Be aware of recovery scammers — people who will contact you claiming they can recover your lost crypto for a fee. They are always scams. There is no legitimate crypto recovery service.
Phase 3 of 4

Recover — Report to Every Relevant Agency

Reporting won't guarantee recovery, but it's critical. Your report contributes to investigations that can result in prosecutions and occasional asset freezes.

2

Report to the crypto exchange or platform used

If you used Coinbase, Kraken, Binance, or another legitimate exchange to send funds, file a fraud report with them. They can sometimes flag destination wallets.

  • Contact the exchange's fraud/security team directly
  • Provide the transaction ID and destination wallet address
  • Ask if any holds or flags can be placed
3

Seek emotional support — this is designed to be traumatic

These scams exploit trust and manufactured relationships. Victims often report feeling ashamed — please don't. These are sophisticated criminal organizations that target smart, careful people. You are not alone.

Phase 4 of 4

Harden — Protect Against the Next Approach

Scammers share victim lists. Once you've been targeted, you may be approached again — often by "recovery" scammers. Here's how to protect yourself.

If someone contacts you after a scam claiming they can help recover your money, this is always another scam. Hang up, block, and report.
1

Freeze your credit and set up fraud alerts

If you provided personal information (SSN, DOB, account numbers) to the scammer, treat your identity as compromised.

2

Secure your remaining accounts and devices

  • If you allowed remote access: run a full malware scan, then factory reset if anything is found
  • Change passwords on all financial accounts
  • Enable 2FA on email and financial accounts
  • Remove any apps you installed at the scammer's instruction
3

Red flags to watch for going forward

  • Anyone contacting you unsolicited about investment opportunities
  • Promises of guaranteed returns or "insider" access
  • Being asked to move money to a new platform for "better rates"
  • Urgency or time pressure ("offer expires today")
  • Anyone who claims they can recover your lost crypto for a fee
Person dealing with a suspected account compromise
Phase 1 of 4

Contain — Lock Down the Most Sensitive Things First

Not sure exactly what happened? Work through these high-priority items in order — they cover the most common breach scenarios.

1

Change your email password right now

Your email is the master key. If only one thing got through, this is the one to secure first.

  • Change your email password from a trusted device
  • Sign out of all other sessions
  • Check for forwarding rules (Settings > Forwarding)
2

Check your most sensitive accounts for unauthorized activity

  • Bank and credit card — check recent transactions
  • Investment / brokerage accounts
  • PayPal, Venmo, Zelle — check recent payments
  • Social media — look for posts or DMs you didn't send
3

Run a breach check

Find out if your email and passwords have been exposed in known data breaches.

Phase 2 of 4

Assess — Narrow Down What Happened

Use these signals to figure out the specific type of breach, then switch to the matching tab for detailed steps.

1

Common signals and what they suggest

Not sure what was hacked? That's okay. Look at this list and find the symptom that matches what you noticed. Then click the matching tab at the top to get the specific steps for that type of incident.

  • Unusual bank charges or transfers → switch to Financial Account
  • Email password reset you didn't request → switch to Email / Central Account
  • Posts or DMs you didn't send on social → switch to Social Media
  • You sent money to someone you met online → switch to Crypto / Investment Scam
  • Pop-up saying your computer is infected, then phone call → Tech Support Scam (follow Crypto / Investment Scam steps)
  • You clicked a link in a suspicious email or text → change your email and any account matching that login
2

Check your devices for malware

If you think a device was compromised (slow, strange behavior, or you allowed remote access), run a scan.

  • Windows: Windows Defender is built-in and effective for most situations
  • Mac: Malwarebytes free version catches the most common threats
  • If in doubt — back up your data and reset the device to factory settings

If you suspect stalkerware — software installed by someone with physical access (a partner or family member) to monitor your location, messages, or calls — do not remove it immediately without planning first. Removing stalkerware can alert the person who installed it. If you are in an unsafe situation, contact the Coalition Against Stalkerware or the National Domestic Violence Hotline at 1-800-799-7233 before taking action on the device.

Phase 3 of 4

Recover — Secure Accounts and Report

Broad recovery steps that apply regardless of breach type.

1

Change passwords on all high-value accounts

Prioritize: email, banking, investment, healthcare, government portals. Use unique passwords for each — this is exactly when a password manager pays off.

2

Enable 2FA on your most important accounts

3

Report the incident — who to contact and when

Different agencies handle different situations. Use this as a decision guide:

  • FTC (ReportFraud.ftc.gov or IdentityTheft.gov): Start here for almost everything — identity theft, scams, fraudulent charges, phishing. Creates a legal record accepted by banks and credit bureaus. Takes about 10 minutes.
  • FBI IC3 (ic3.gov): Report here if money was actually transferred (wire fraud, crypto scam, business email compromise) or if the loss is over $500. The FBI aggregates these reports and uses them to pursue organized cybercrime.
  • Local police: File a report if you know the person who did it, if a physical device was stolen, or if a creditor specifically requires a police report number. For most online fraud, local police have limited jurisdiction but the report number is useful documentation.
  • Call 911 only if: You are in immediate physical danger, the attacker has made threats, or a ransomware attacker is demanding in-person contact.
4

Check your homeowners or renters insurance

This is often overlooked, but many standard homeowners and renters policies include an identity theft endorsement or rider. If you've experienced financial fraud, account takeover, or identity theft, call your insurer before assuming you're on your own.

  • Call your home or renters insurance company and ask: "Do I have any identity theft or cyber coverage on my policy?"
  • Coverage typically includes: lost wages, legal fees, notary and filing costs, and credit monitoring services — often $15,000-$25,000
  • Time-sensitive: most policies require you to report within 30-60 days of discovering the incident
  • You'll need a copy of your FTC report or police report to file the claim
Phase 4 of 4

Harden — The Essential Security Baseline

Whatever happened, these five changes make the next incident far less likely and far less damaging.

1

Use a password manager — this changes everything

2

Add 2FA to email, banking, and social accounts

3

Freeze your credit — it's free and permanent until you unfreeze it

5

Talk to your family — make a plan before the next incident

Who should a family member call if they think they've been hacked? What's the first three things to do? Having a simple, shared plan matters more than any single security product.
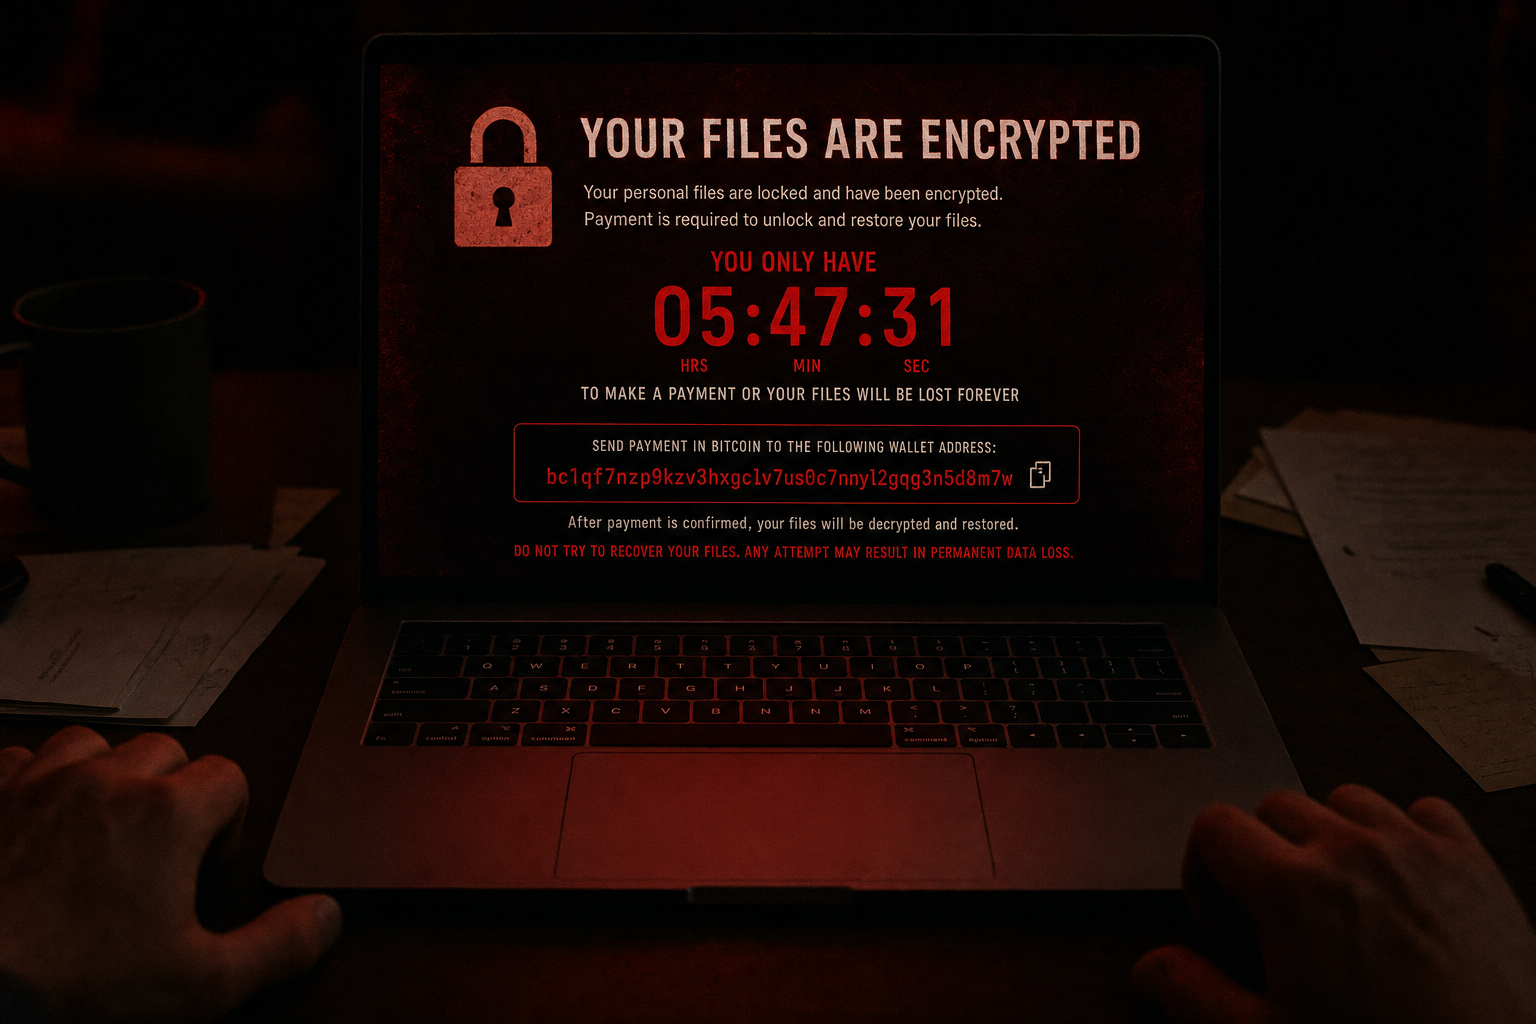
Ransomware encryption notice on a laptop screen
Phase 1 of 4

Contain — Stop the Spread

Every second ransomware runs, more files are encrypted. Isolation is the single most important thing you can do right now.

Stop the spread immediately. Ransomware encrypts everything it can reach — local files, mapped drives, network shares, connected backups. Every second it runs, more files are gone. Isolation is the single most important thing you can do right now.
1

Disconnect from the network — immediately

Unplug the ethernet cable and turn off Wi-Fi right now. If this is a work laptop or a device connected to other computers, also disable Bluetooth.

Why you should NOT shut down the device yet: Some ransomware decryption tools only work when the encryption is still running in memory. Shutting down can also destroy the forensic evidence (like the attacker's tools or wallet address) that law enforcement needs. Keep it on but completely offline — no Wi-Fi, no ethernet, no Bluetooth.
2

Isolate connected devices on the same network

Ransomware spreads laterally. Disconnect any other computers, NAS drives, or external hard drives that were connected to the same router. If you have a smart home hub or other networked devices, disconnect those too.

3

Do not pay the ransom yet — and do not reformat

Payment does not guarantee file recovery and funds criminal operations. Before paying anything, check whether a free decryptor exists for your ransomware variant. Reformatting destroys any chance of recovery — leave the disk intact.

4

Photograph the ransom note

Use your phone to photograph the screen before doing anything else. You will need the ransomware name, the wallet address, and any contact email for law enforcement reports and insurance claims.

5

Business only: activate your incident response plan and notify IT/MSP

If this is a business device, call your IT provider or MSP immediately — do not try to handle it alone. Notify your cyber insurance carrier within 24 hours; late notice can void coverage. Do not touch servers or shared drives until your IR team is engaged.

Phase 2 of 4

Assess — Understand What Was Hit

Skipping assessment is the most common recovery mistake. Identify the entry point before you restore anything.

Understand what was hit before you start recovering. Skipping assessment is the most common recovery mistake — people wipe and restore, then get reinfected within days because the initial access point was never identified.
1

Identify the ransomware variant

Upload the ransom note or an encrypted file sample to ID Ransomware. Knowing the exact variant tells you whether a decryptor exists and how the malware typically enters systems.

2

Determine the scope — what was encrypted?

List every folder, drive, and cloud service accessible from the infected device. First, confirm it is actual ransomware, not scareware: scareware is a fake browser pop-up claiming your files are encrypted — it has NOT actually locked anything. If you can still open your files normally, close the browser (via Task Manager, not the X button), do not call any phone number displayed in the warning, and do not pay. True ransomware physically renders files unopenable — wrong file extensions, files will not open in any app. Check whether cloud sync (OneDrive, Google Drive, iCloud) propagated encrypted versions of your files — this is common and means your cloud backup may also be compromised.

3

Check your backups — are they intact?

External drives connected at the time of infection are likely encrypted. Check an offline backup (a drive that was unplugged, or a cloud backup with versioning enabled). If you use Windows Backup or Time Machine and it was connected, assume it is compromised.

4

Find the entry point

Common entry points: phishing email with malicious attachment or link, RDP exposed to the internet, unpatched software vulnerability, malicious download. Check your email for suspicious messages received 1-3 days before the infection appeared. If you clicked a link or opened an attachment, that is likely the source.

5

Business only: determine if data was exfiltrated (double-extortion)

Many ransomware groups steal data before encrypting it, then threaten to publish it if you do not pay. Check the attacker's communication for mention of stolen data. If customer or employee PII was accessed, you likely have a breach notification obligation under state law.

Phase 3 of 4

Recover — Restore from Clean Backup

Restore only after confirming the threat is gone. Restoring into an infected environment means reinfection within hours.

Restore from a known-clean backup — after confirming the threat is gone. Restoring to an infected environment means you will be reinfected within hours.
1

Report to law enforcement before paying anything

File with the FBI Internet Crime Complaint Center and CISA. Law enforcement can sometimes assist with key recovery or disrupt attacker infrastructure. Reports also help establish patterns used to develop future decryptors.

2

Check No More Ransom for a free decryptor

Over 160 ransomware families have free decryptors available. Check before paying any ransom. New decryptors are added regularly as law enforcement disrupts ransomware operations.

3

Wipe and reinstall — do not "clean" an infected machine

Ransomware often installs backdoors that survive malware removal. The only trustworthy recovery is a full OS reinstall from original media. Back up any unencrypted files you still need first, then wipe the drive completely before reinstalling.

4

Restore from your oldest clean backup

Use the most recent backup that predates the infection. If you are unsure when the infection started, use a backup from at least two weeks prior. Verify files open correctly before reconnecting to your network.

5

Change all passwords from a separate, clean device

The infected machine may have had a keylogger running before the ransomware detonated. Change every password — especially email, banking, and password manager — from a phone or another computer that was not on the same network.

6

Business only: notify affected parties and review insurance coverage

If customer, employee, or patient data was accessed or exfiltrated, state breach notification laws require you to notify affected individuals within a set timeframe (typically 30-60 days). Contact your cyber insurance carrier immediately — most policies require prompt notice and may cover ransom negotiation, recovery costs, and legal fees.

Phase 4 of 4

Harden — Close the Door

Close the entry point the attacker used. Most victims who don't harden are reinfected within 12 months.

Close the door the attacker used — and make sure it can't happen again. Most ransomware victims who pay or recover without hardening are reinfected within 12 months.
1

Implement the 3-2-1 backup rule

3 copies of your data, on 2 different media types, with 1 stored offsite or offline. At minimum: an external drive that stays unplugged except during backups, plus a cloud backup with version history enabled. Backups that are always connected are not backups — they are part of the attack surface.

2

Enable ransomware protection on Windows and macOS

Windows Defender has built-in Controlled Folder Access — enable it in Windows Security → Virus & threat protection → Ransomware protection. On macOS, Time Machine with a dedicated backup drive (kept offline between backups) is your primary defense.

3

Patch everything — OS, browser, and plugins

Enable automatic updates on your operating system, browser, and any plugins (especially Adobe Reader and Java). The majority of ransomware exploits known vulnerabilities for which patches already exist.

4

Use a password manager and enable MFA everywhere

Credential theft often precedes ransomware — attackers steal passwords first, then move laterally. A password manager with unique passwords per site and MFA on every critical account closes the most common initial access path.

5

Business only: disable RDP or put it behind a VPN

Remote Desktop Protocol exposed directly to the internet is the leading ransomware entry point for small businesses. Either disable RDP entirely if it is not needed, or require VPN access before RDP is reachable. Enable Network Level Authentication and account lockout policies.

6

Run a security posture check

Review every device on your network for outdated software, exposed ports, and shared credentials. If this was a business incident, bring in a professional for a post-incident review before declaring recovery complete.

Questions?

Email hello@ohanasec.io — Andrew or Ashley will get back to you directly.

Get in Touch Download This Guide (PDF)